This tutorial guides you through the process of using Virtualmin’s script installer to add web applications to your domain.
Getting started with script installer
After logging into Virtualmin, follow these steps to install a script:
Select your domain
Choose the domain where you want to install the script by selecting it from the dropdown menu in the top-left corner.Access Install Scripts
Look for the Install Scripts option in the menu. This brings up a list of available scripts organized by categories such as blogs, content management systems, and forums.Choose a script to install
Find the script you want to install; for example, to add WordPress, locate and select it by clicking the corresponding radio button.Installation options
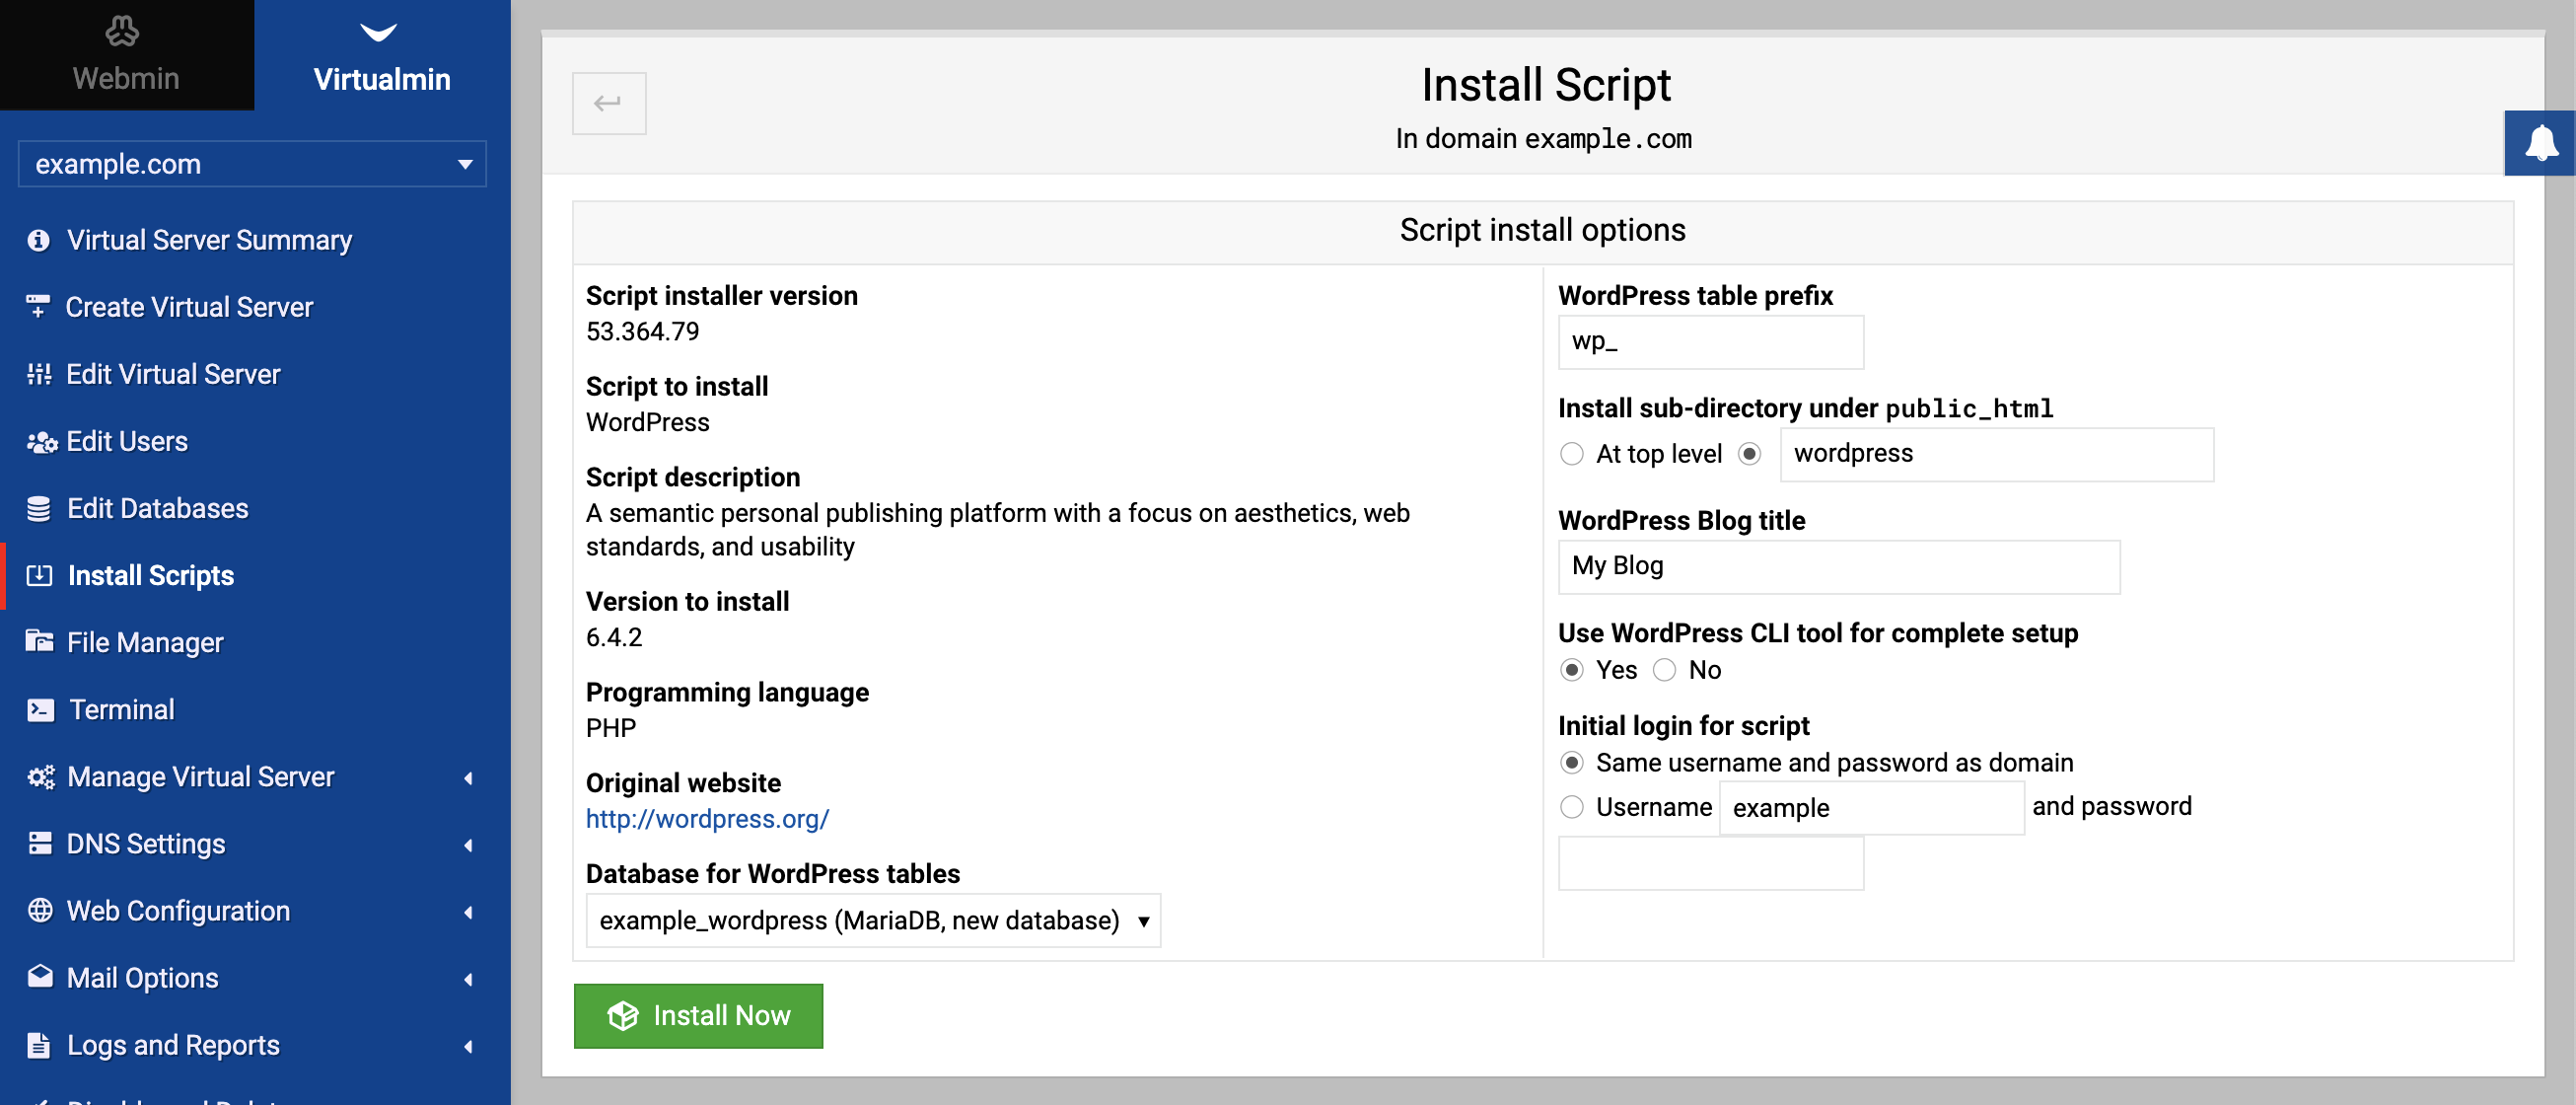
Scroll to the bottom and click Show Install Options. This section allows you to configure installation details:
Usually, the default options are suitable for most installations.
Initiate the installation
Click Install Now to begin the installation process. Virtualmin will handle the rest, setting up the script on your domain.Post-installation
Once the script is installed, Virtualmin will provide you with a URL. Visit this URL to manage your new script installation, where you can start customizing your site.
Tips for script management
- The Installed Scripts tab shows scripts already set up in your domain, allowing for easy management and updates.
- The Available Scripts tab lists all applications available for installation, complete with descriptions and categories for convenience.
- Some scripts offer Unsupported Version installations, which you can find under the respective tab. These are typically older versions not tested with the current version of Virtualmin and might pose compatibility or security risks.
Remember to check the script’s requirements and ensure your server environment matches them for optimal performance and security.