This guide explains how to password-protect a directory within your website using Virtualmin, adding an extra layer of security and ensuring that only authorized users can access sensitive content.
How to password protect a directory
The ability to password-protect a directory at the moment is only available in systems with Apache installed.
Here’s how to set it up:
Select the domain: Log into Virtualmin and choose the domain where you want to add password protection. Do this by selecting the domain name from the drop-down box in the top-left corner of the left menu.
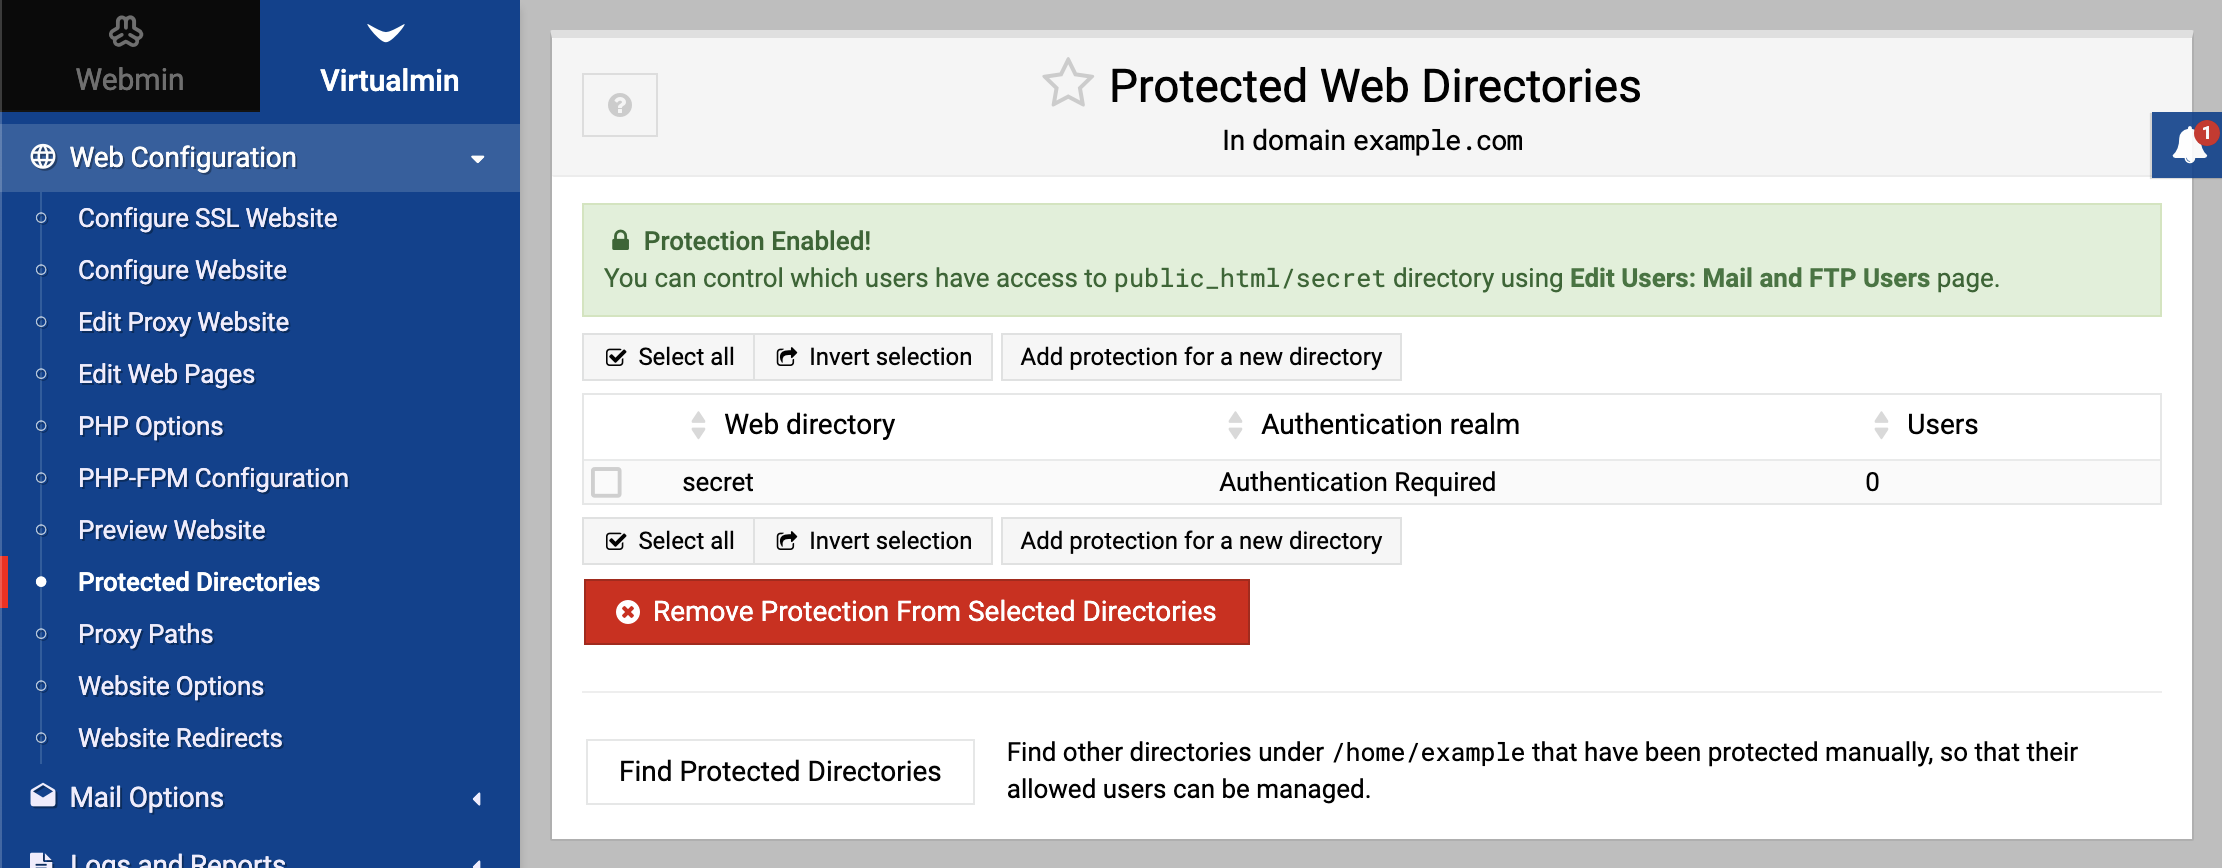
Navigate to directory protection: Click on Web Configuration and then select Protected Directories. This section allows you to manage access to various parts of your website:

Choose directory scope: Decide whether you want to protect the entire website, a specific sub-directory, or a section of the cgi-bin. This choice depends on which part of your site you want to secure.
- If choosing a sub-directory or cgi-bin, enter the relative directory name. For instance, for a directory located at
https://example.com/secret/, you would enter secret.
- If choosing a sub-directory or cgi-bin, enter the relative directory name. For instance, for a directory located at
Set the authentication realm: Enter a name in the Authentication Realm field. This name is what users will see when prompted for a password, serving as an identifier for the protected area.
Create the protected directory: Click Create to establish the password-protected area:

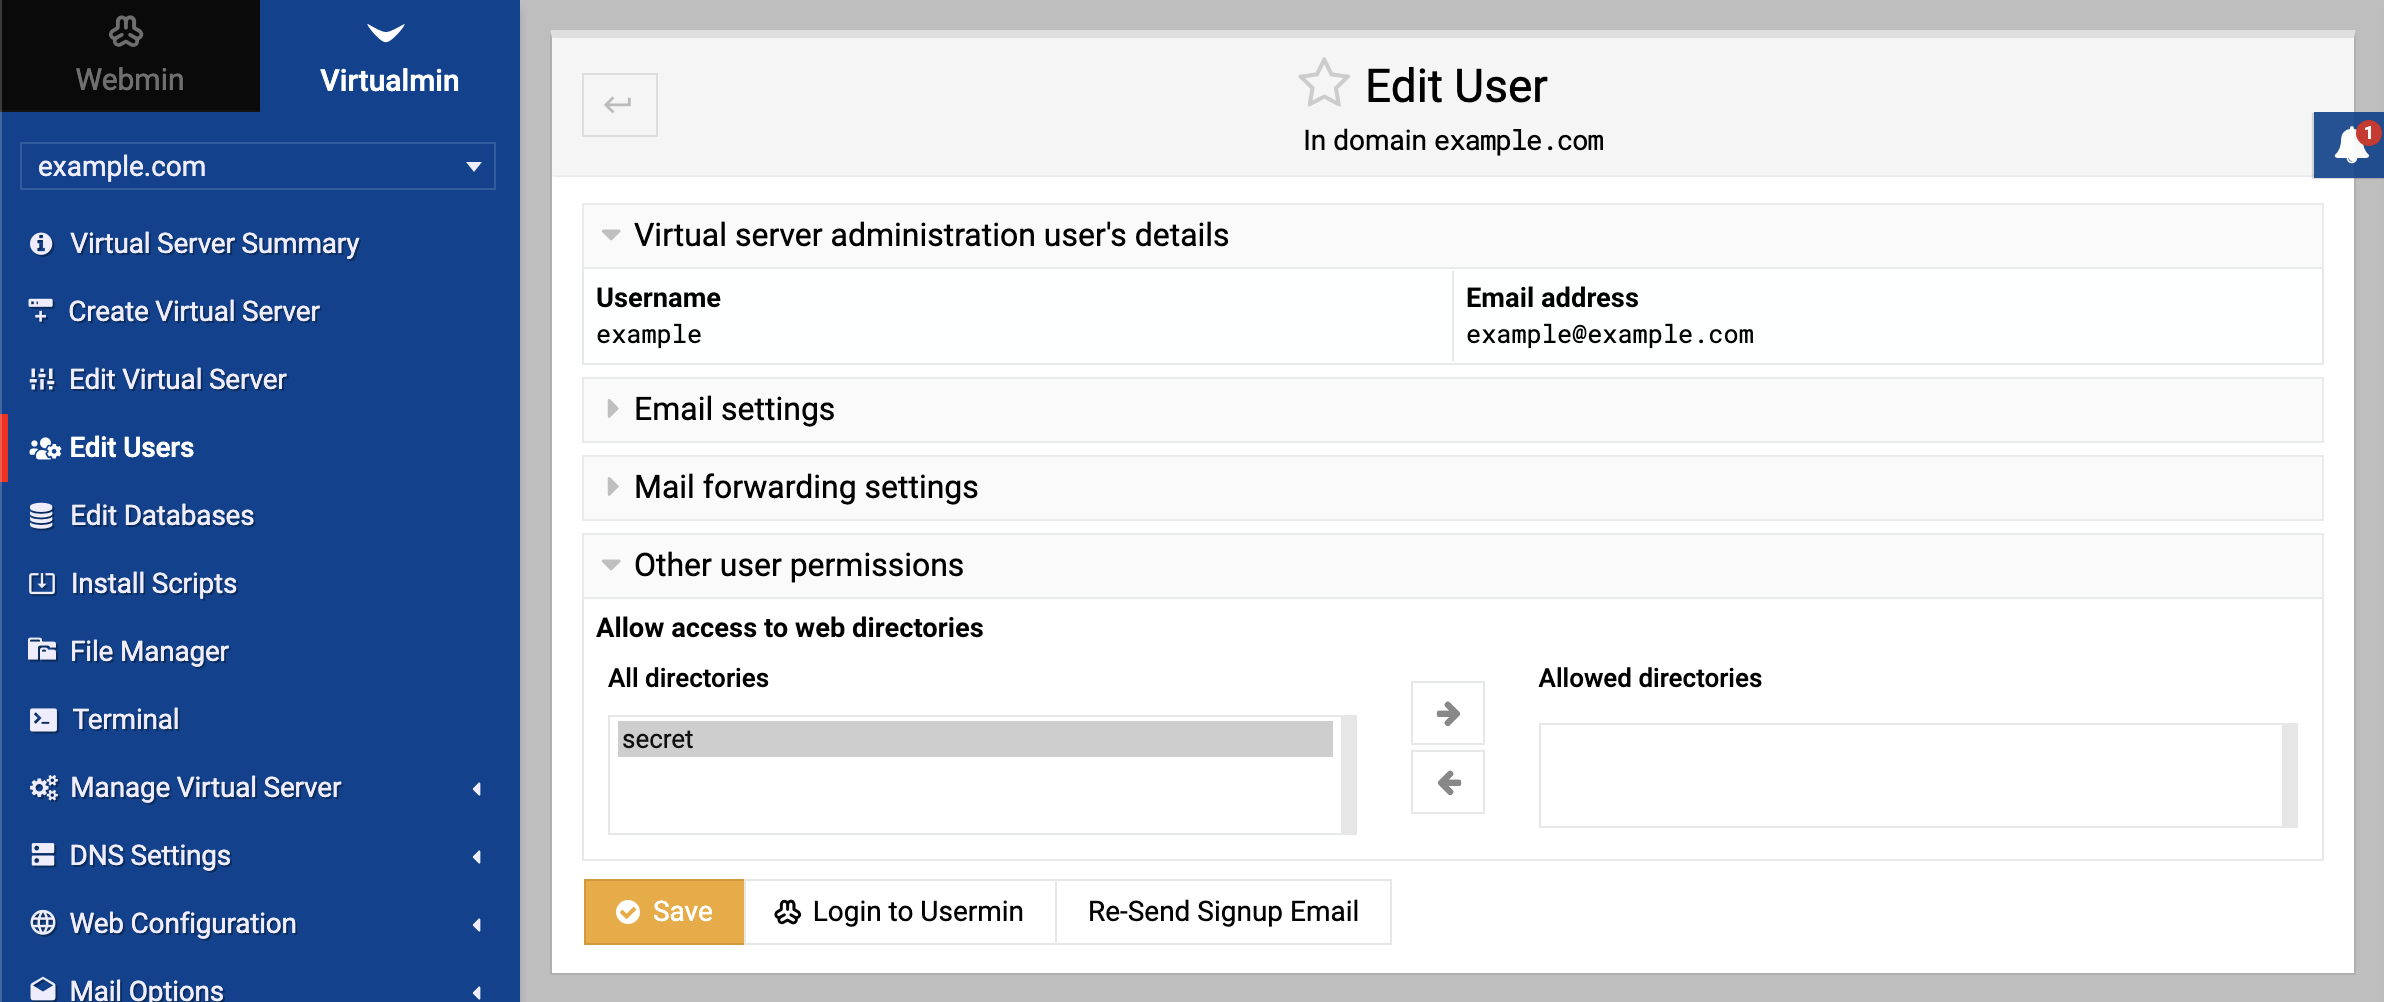
Assign user permissions: Go to Edit Users, then select a username, and navigate to Other User Permissions. In the Allow access to web directories section, specify which directories the user should have access to by double-clicking on the desired directory name displayed on the left side of the selection pane:

After double-clicking, the directory granted access will move from the left pane to the right. This step is crucial for granting or restricting access to the protected directory.