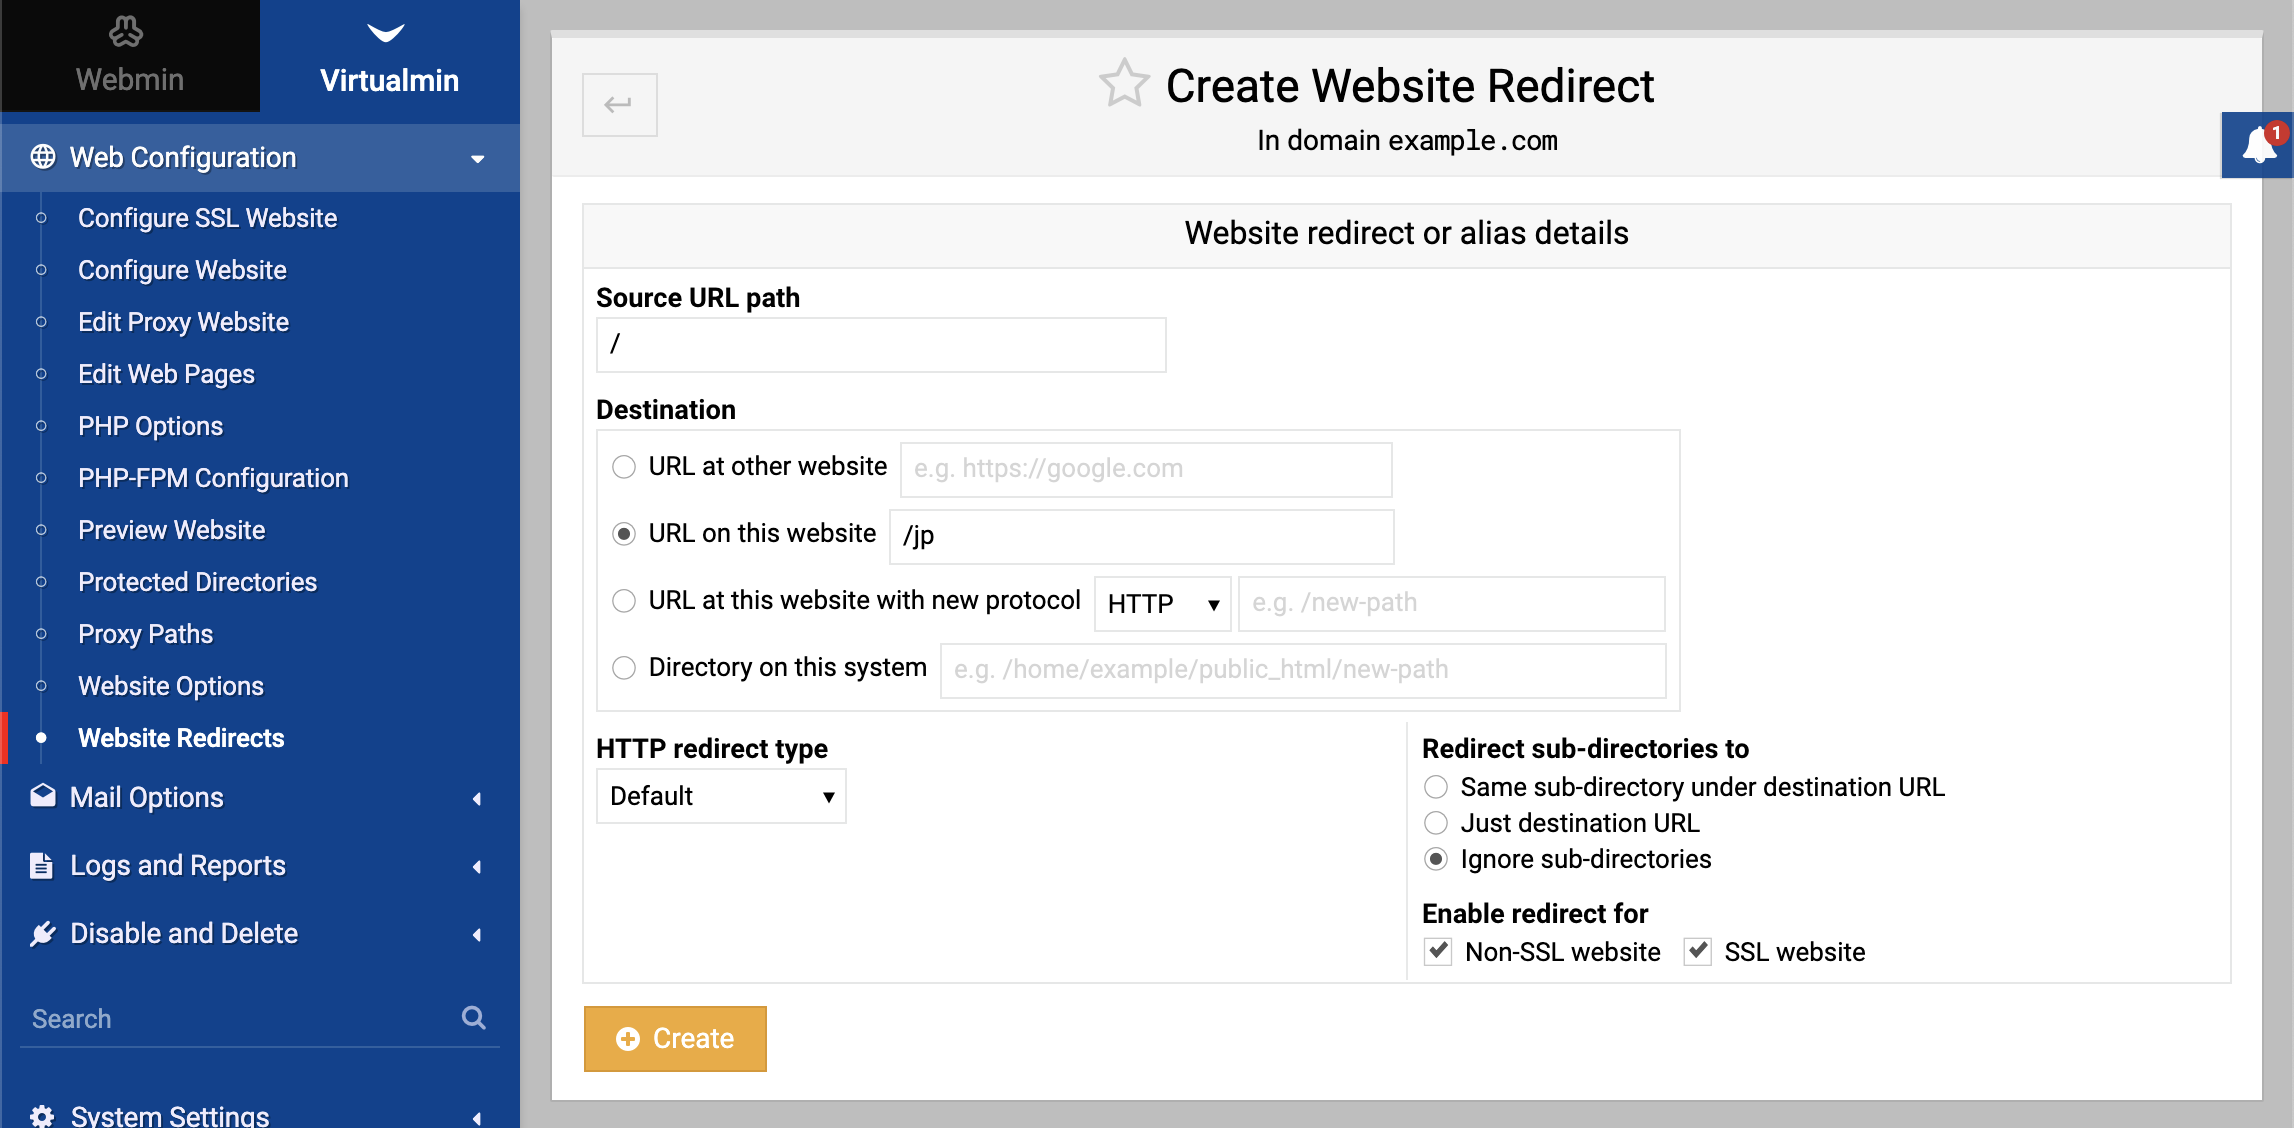
This guide provides a comprehensive overview of setting up URL redirects in Virtualmin. Perfect for website administrators looking to redirect traffic from one URL to another.
How to set up URL redirects
URL redirects are a crucial tool for guiding traffic to the right place on your website. Whether you’re redirecting old URLs to new ones or consolidating web pages, here’s how to manage URL redirects in Virtualmin:
Select the domain: After logging into Virtualmin, choose the domain where you wish to add a URL redirect. This can be done by selecting the domain name from the drop-down box in the top-left corner of the left menu.
Access server configuration: Click on Web Configuration in the domain’s menu. This section lets you modify various settings related to your server.
Navigate to website redirects: Select Website Redirects. This option is specifically for managing how URLs are redirected within your domain.
Add a new redirect: Click on Add a new website redirect. This will open a form where you can specify the details of the URL redirect:

Configure source URL: In the Source URL path field, enter the path of the URL you want to redirect. This could be a root directory (
/) or a specific path (e.g.,/foo/bar).Set destination URL: In the Destination field determines where the source URL will redirect to. Options include:
- URL at other website: Redirects to a specified external URL. If a sub-directory of the path is accessed, the redirect includes that path.
- URL on this website: Redirects to another path within the same domain.
- URL at this website with new protocol: Changes the protocol (like HTTP to HTTPS) while keeping the same domain and path.
- Directory on this system: Serves content from a specified directory within the domain’s home directory, ideally under
public_html.
HTTP redirect type: Customizes the HTTP status code for redirects. This is relevant when redirecting to an external URL and can be set to different codes like 302 or 301, depending on your needs.
Redirect sub-directories to: Controls how sub-paths under the source URL are handled. Options include:
- Same sub-directory under destination URL: Redirects a path like
/foo/bartohttp://foo.com/bar. - Just destination URL: Redirects all sub-paths to the main destination URL.
- Ignore sub-directories: Only the exact source path is redirected; sub-paths are not affected.
Note: This option should be used when Source URL path is set to
/to avoid redirect loop.
- Same sub-directory under destination URL: Redirects a path like
Enable redirect for: Selects whether the redirect applies to SSL, non-SSL, or both types of websites. This is useful for enforcing SSL connections by redirecting all non-SSL traffic to the SSL version of a site.
Create the redirect: Click Create to finalize the setup. Your URL redirect is now active, and visitors to the source URL will be automatically redirected to the destination URL.
By following these steps, you can efficiently manage URL redirects in Virtualmin, ensuring users are navigated correctly and improving the overall user experience on your website.