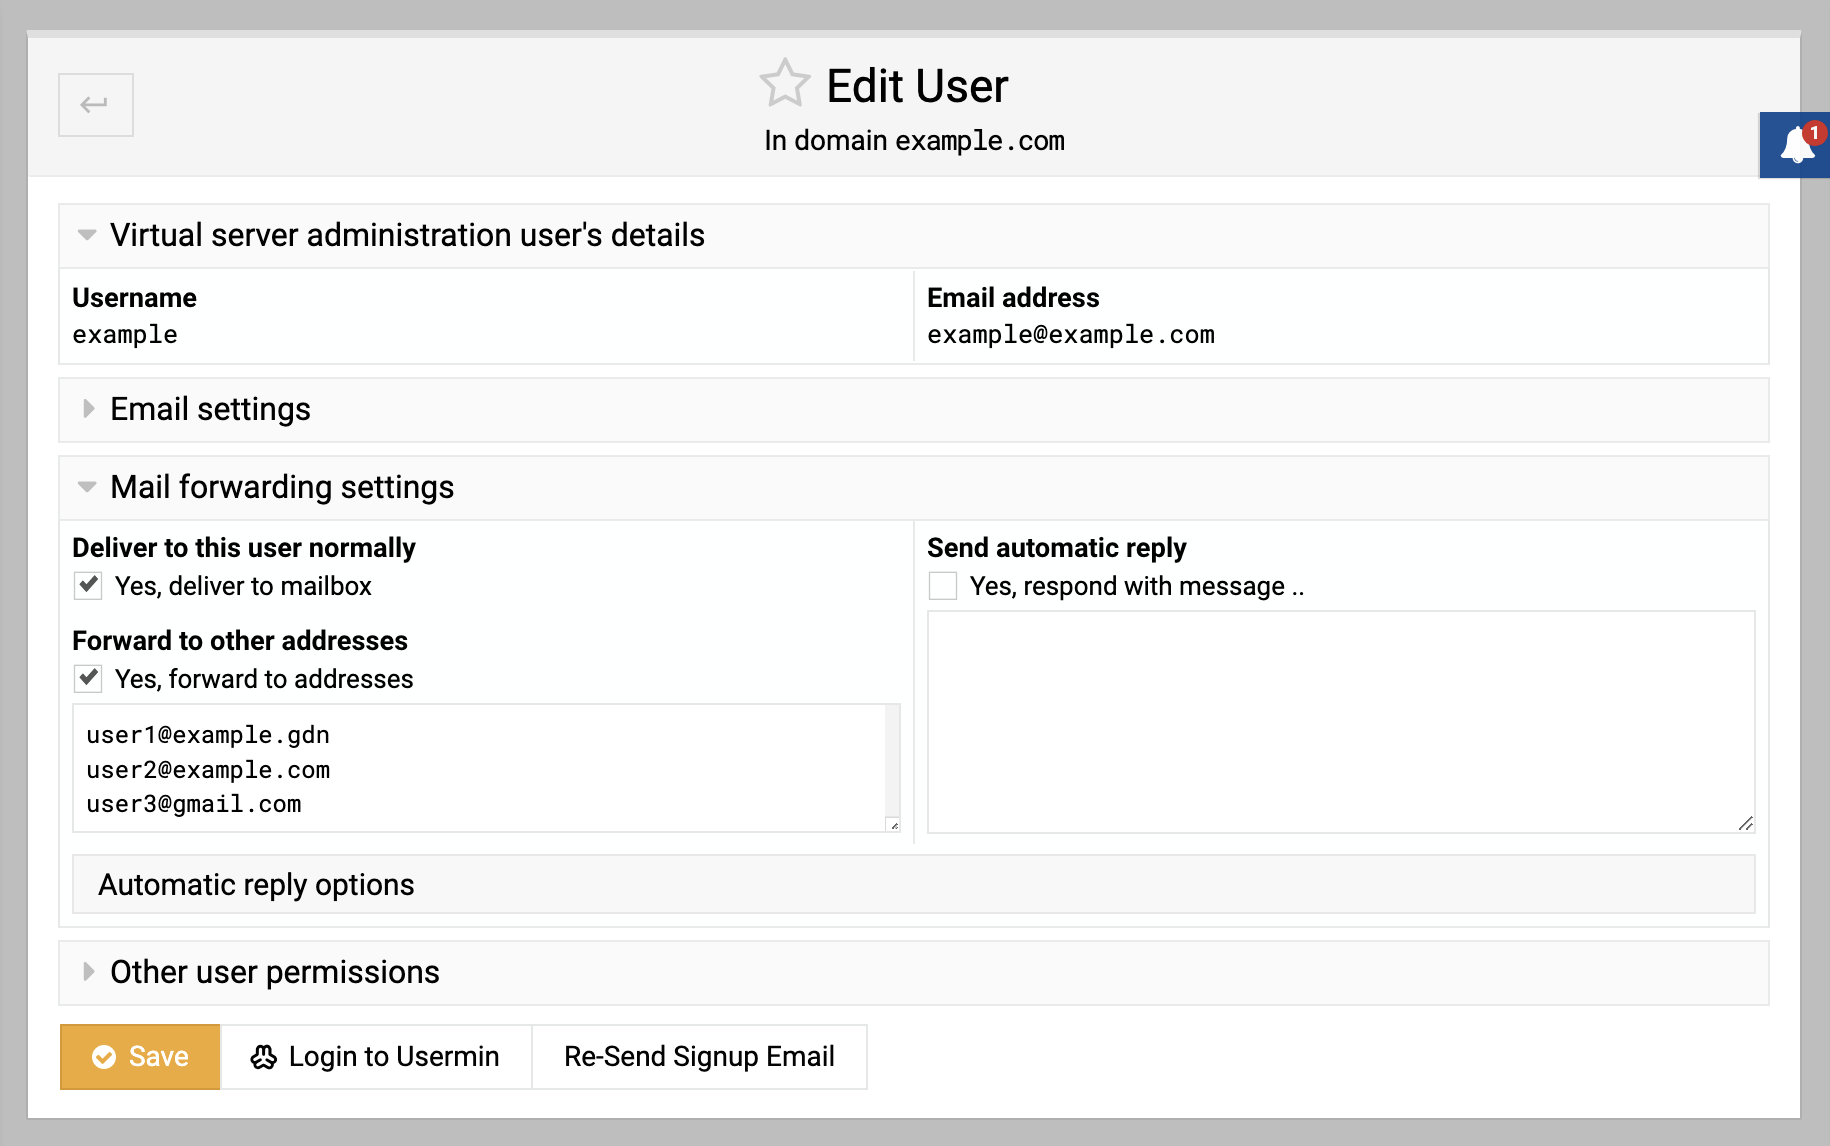
This guide outlines the process of setting up email forwarding in Virtualmin, enabling you to redirect emails from one account to other email addresses. Ideal for managing communications and ensuring important messages are received in multiple inboxes.
How to set up email forwarding
Email forwarding in Virtualmin allows you to automatically send copies of incoming emails to other addresses. Here’s how to configure it:
Select the domain: After logging into Virtualmin, choose the domain where you want to set up email forwarding. This can be done by selecting the domain name from the drop-down box located in the top-left corner of the left menu.
Navigate to user management: Click on Edit Users. This option is for managing email accounts associated with the domain.
Choose an email account: Select the email account you want to set up forwarding for by clicking on the user’s name.
Access mail forwarding settings: In the user’s settings, find and click on Mail forwarding settings. Here, you will find options to configure email forwarding:

Enable forwarding: Check the box next to Forward to other addresses. This activates the email forwarding feature.
Enter forwarding addresses: In the text area below Forward to other addresses, input the email addresses you want the emails forwarded to, placing one address per line.
Save the settings: Click Save to apply the forwarding settings. Emails to this account will now be automatically forwarded to the specified addresses.
Setting up email forwarding in Virtualmin is a straightforward way to ensure that emails reach additional recipients, whether for backup, convenience, or collaborative purposes.